×
- Hello
- Login or Register
- Quick Links
- Live Chat
- Track Order
- Parts Availability
- RMA
- Help Center
- Contact Us
- Shop for
- Audi Parts
My Garage
My Account
Cart
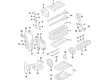
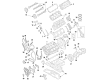
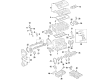
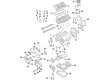
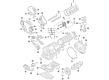
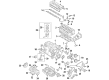
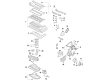
Genuine Audi Crankshaft
Crank Shaft- Select Vehicle by Model
- Select Vehicle by VIN
Select Vehicle by Model
orMake
Model
Year
Select Vehicle by VIN
For the most accurate results, select vehicle by your VIN (Vehicle Identification Number).
35 Crankshafts found


Audi Crankshaft Part Number: 06K-105-101-A
$699.11 MSRP: $903.83You Save: $204.72 (23%)Ships in 1-2 Business Days


Audi Crankshaft Part Number: 077-105-101-BH
$2203.88 MSRP: $2645.71You Save: $441.83 (17%)Ships in 1-2 Business Days

Audi Crankshaft Part Number: 06A-105-021-BN
$954.38 MSRP: $1233.84You Save: $279.46 (23%)Ships in 1-2 Business DaysProduct Specifications- Replaces: 06A-105-021-J


Audi Crankshaft Part Number: 079-105-019-F
$1024.89 MSRP: $1325.00You Save: $300.11 (23%)Ships in 1-2 Business Days


Audi Crankshaft Part Number: 034-105-021-K
$1044.23 MSRP: $1350.00You Save: $305.77 (23%)Ships in 1-2 Business Days

Audi Crankshaft Part Number: 06A-105-021-BC
$1048.39 MSRP: $1355.38You Save: $306.99 (23%)Ships in 1-2 Business DaysProduct Specifications- Replaces: 06A-105-021-AF


Audi Crankshaft Part Number: 06L-105-101-F
$1204.86 MSRP: $1446.41You Save: $241.55 (17%)Ships in 1-2 Business Days


Audi Crankshaft Part Number: 059-105-101-BH
$1452.85 MSRP: $1744.11You Save: $291.26 (17%)Ships in 1-2 Business Days

Audi Crankshaft Part Number: 06A-105-021-BP
$1523.19 MSRP: $1828.56You Save: $305.37 (17%)Ships in 1-2 Business DaysProduct Specifications- Replaces: 06A-105-021-S, 06A-105-021-AR


Audi Crankshaft Part Number: 03L-105-021-C
$1573.76 MSRP: $1889.27You Save: $315.51 (17%)Ships in 1-2 Business DaysProduct Specifications- Replaces: 03G-105-021-S


Audi Crankshaft Part Number: 078-105-101-AB
$1775.96 MSRP: $2132.00You Save: $356.04 (17%)Ships in 1-2 Business DaysProduct Specifications- Replaces: 078-105-019-AH, 078-105-101-Q, 078-105-019-S


Audi Crankshaft Part Number: 06C-105-019-C
$2202.69 MSRP: $2644.29You Save: $441.60 (17%)Ships in 1-2 Business Days


Audi Crankshaft Part Number: 06E-105-101-AK
$2469.24 MSRP: $2964.28You Save: $495.04 (17%)Ships in 1-2 Business Days

Audi Crankshaft Part Number: 06E-105-101-AD
$2507.91 MSRP: $3010.70You Save: $502.79 (17%)Ships in 1-2 Business DaysProduct Specifications- Replaces: 06E-105-101-S, 06E-105-101-AA

Audi Crankshaft Part Number: 079-105-101-CL
$4774.03 MSRP: $5731.13You Save: $957.10 (17%)Ships in 1-2 Business DaysProduct Specifications- Replaces: 079-105-101-CB
Audi Crankshaft Part Number: 058-105-019-C
$684.55 MSRP: $885.00You Save: $200.45 (23%)Ships in 1-2 Business DaysAudi Crankshaft Part Number: 026-105-101-R
$684.55 MSRP: $885.00You Save: $200.45 (23%)Ships in 1-2 Business Days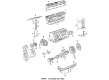
Audi Crankshaft Part Number: 034-105-101-S
$1079.03 MSRP: $1395.00You Save: $315.97 (23%)Ships in 1-2 Business DaysProduct Specifications- Replaces: 054-105-101
Audi Crankshaft Part Number: 022-105-101-A
$2697.97 MSRP: $3488.00You Save: $790.03 (23%)Ships in 1-2 Business DaysProduct Specifications- Replaces: 021-105-101-F
Audi Crankshaft Part Number: 07K-105-101-P
$2312.04 MSRP: $2775.55You Save: $463.51 (17%)Ships in 1-2 Business Days
| Page 1 of 2 |Next >
1-20 of 35 Results
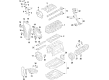
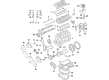
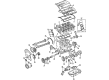
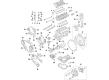
Audi Crankshaft
Audi Crankshaft transforms the up and down force of the pistons to a smooth rotary movement that feeds the gearbox and ultimately the wheels to make every journey feel steady and strong. Forged out of high-grade steel, the Crankshaft maintains rigidity at high rpm, its counterweights keep vibrations at a low level, while its oil passages allow lubricant to flow freely to keep wear minimal across the entire Audi range. Because the balance is built in, the Crankshaft allows for quick throttle response and the durability of the Crankshaft means long engine life for owners without any concern of hidden twists or cracks. Even under the stress of spirited driving, each Crankshaft stays aligned precisely with bearings to transform explosive combustion into reliable acceleration mile after mile. Alongside this hidden hero, Audi as a brand has Quattro all-wheel drive for surefooted traction, lightweight yet strong body structures for safety and sharp handling that turns daily commutes into fun drives. The company began in 1909 and now combines tradition and innovation, from Virtual Cockpit digital gauges to matrix LED headlights that light up dark roads without glare. Audi is also pressing ahead with e-tron electric models and testing self-driving technology, showing that progress never sleeps. Elegant interiors, sporty styling, and meticulous build quality give Audi a reputation for confidence and comfort that is equal to the mechanical excellence of its engines, and fans love the way the four-ring emblem signals engineering trust while still promising new ideas every model year.
Stick with genuine OEM Crankshaft when you need quality that holds up. Audi crafts these parts to hit strict factory specs for every single unit. They also run each part through rigorous checks during production to maintain high quality. You can find exact Audi Crankshaft you need in our huge stock at AudiPartsGiant.com. You'll love our low, economical prices too. Every OEM part carries a real manufacturer's warranty, so you can buy with confidence. Returns aren't a headache here because our policy is simple. Plus, our speedy delivery gets orders out fast. Shop today and buy with total peace of mind.
Audi Crankshaft Parts and Q&A
- Q: How can the running clearance check on the crankshaft be performed using bearing shells on Audi A3?A:The running clearance check can be done using original bearing shells but it is better to fit a new bearing set for more definitive results, in which case clean all the protective grease off the shells with a paraffin. Clean the back of the bearing shells and the location of the bearings in the cylinder block/crankcase AND the main bearing caps. Position the cylinder block on a clean work surface with the crankcase uppermost, pushing the bearing shells into their position making sure to align the tab in each shell with the notch and that the oil holes are lined up, being careful not to touch the bearing surfaces. Working on a crankshaft end float control: Fit the crankshaft end float control thrust washer halves to either side of the No 3 bearing location, using a little bit of grease to hold them in place on the in the correct seated position, i.e. oil grooves facing outwards. It is possible to check the running clearance, but it requires the use of internal micrometers or expanding calipers. refit the main bearing caps with bearing shells in place tighten the original cap retaining bolts to the specified torque to measure the internal diameter of each assembled pair of bearing shells, and subtract the diameter of the crankshaft journals to determine the running clearance of the main bearing. Carefully remove the crankshaft from the cylinder block, clean the bearing shell surfaces and where appropriate refit the crankshaft speed/position sensor wheel, tightening the bolts to the specified torque in the correct orientation. Liberally coat the bearing shells in the crankcase in clean engine oil with the bearing shells correctly seated and lower the crankshaft into position (No.1 cylinder crankpin at BOC) taking care not to damage the sensor wheel. Lubricate the lower of bearing shells in the main bearing caps and make sure the thrust washer halves are properly seated. Fit the main bearing caps in the correct sequence i.e. keeping No 1 bearing cap at the end of the timing belt, hand tighten the bolts and then tighten them to the specified value of torque i.e. work from the center bearing cap and outward. Check that the crankshaft rotates freely by hand, check the bearing running clearances once again if resistance is felt, check for crankshaft endfloat, make sure that this is within spec if new thrust washers have been fitted. Refit the pistons and connecting rods/con. rods to Crankshaft and proceed according to type of Engine: SOHC Petrol refit Crankshaft Oil Seal housings, Flywheel / Driveplate, Oil pump and Oil pick up pipe, sump and Oil baffle plate, Crankshaft Sprocket and Timing belt, Diesel Engines refit Crankshaft Oil seal housings, Flywheel / driveplate, Oil pump and Oil pick up pipe, sump and Oil Baffle plate, Crankshaft Sprocket and Timing Belt.
- Q: What steps are involved in removing and reinstalling a crankshaft on Audi A4?A:Removal of the crankshaft is only possible when the engine is removed out of the automobile, though it is assumed that the flywheel, crankshaft pulley, timing chain, oil pan, oil pump, oil filter, balance shaft assembly (on four-cylinder and 3.0 liter V6 models) and piston/connecting rod assemblies have been removed. Measure the crankshaft endplay at the dial indicator prior to removal aligned with the crankshaft. Lever the crankshaft out, adjust the indicator to zero, then lever it in the opposite direction to verify the reading, a normal endplay is between 0.003 and 0.010 inch. Where there is a lack of a dial indicator, clearance can be found with the help of feeler gauges. The main bearing cap bolts should be loosened step by step and then the caps can be loosened by lightly tapping them with a soft hammer, after which they should be removed. With care, remove the crankshaft, preferably with help and refit the main bearing caps with the arrows towards the front. To install, make sure that the engine block and crankshaft are clean and checked. Set the block in an inverted position, and wipe the bearing surfaces. Install new upper main bearing inserts making sure that the oil holes fit, install the lower inserts in the caps. Measure the main bearing oil clearance with Plastigage, the value of which must be between 0.0015 and 0.0023 inch. In case of inappropriate clearance, check the cleanliness and you can take into consideration alternative bearing sizes. After wiping out Plastigage residue, wipe the faces of bearing inserts and place a layer of grease or assembly lube on them before replacing the crankshaft. Install main bearing caps, lubricate bolt threads with clean engine oil, and screw in that order. Re-check crankshaft endplay, turn crankshaft and verify it moves freely and then replace new rear main oil seal.


Related Audi Parts
 Audi Oil Filter
 Audi Dipstick
 Audi Belt Tensioner
 Audi Camshaft
 Audi Camshaft Seal
 Audi Cylinder Head
 Audi Oil Pan Gasket
 Audi Piston
 Audi Camshaft Bearing
 Audi Crankshaft Timing Gear
 Audi Oil Pan Baffle
 Audi Variable Timing Sprocket
Browse by Model
100 Crankshaft 100 Quattro Crankshaft 200 Crankshaft 200 Quattro Crankshaft 5000 Crankshaft 5000 Quattro Crankshaft 80 Crankshaft 80 Quattro Crankshaft 90 Crankshaft 90 Quattro Crankshaft A3 Crankshaft A3 Quattro Crankshaft A4 Crankshaft A4 Quattro Crankshaft A5 Quattro Crankshaft A5 Sportback Crankshaft A6 Crankshaft A6 Quattro Crankshaft A7 Quattro Crankshaft A8 Quattro Crankshaft Allroad Quattro Crankshaft Cabriolet Crankshaft Coupe Quattro Crankshaft Q5 Crankshaft Q5 Sportback Crankshaft Q7 Crankshaft R8 Crankshaft RS Q8 Crankshaft RS4 Crankshaft RS5 Crankshaft RS7 Crankshaft RS7 Sportback Crankshaft S4 Crankshaft S5 Crankshaft S6 Crankshaft S7 Crankshaft S8 Crankshaft SQ5 Crankshaft TT Quattro Crankshaft TT RS Quattro Crankshaft TTS Quattro Crankshaft