×
- Hello
- Login or Register
- Quick Links
- Live Chat
- Track Order
- Parts Availability
- RMA
- Help Center
- Contact Us
- Shop for
- Audi Parts
My Garage
My Account
Cart
Genuine Audi 100 Oil Pan
Oil Drain Pan- Select Vehicle by Model
- Select Vehicle by VIN
Select Vehicle by Model
orMake
Model
Year
Select Vehicle by VIN
For the most accurate results, select vehicle by your VIN (Vehicle Identification Number).
4 Oil Pans found


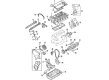
Audi 100 Oil Pan Part Number: 038-103-601-AQ
$171.36 MSRP: $240.00You Save: $68.64 (29%)Ships in 1-2 Business Days


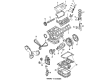
Audi 100 Oil Pan Part Number: 078-103-604-B
$195.16 MSRP: $273.33You Save: $78.17 (29%)Ships in 1-2 Business Days

Audi 100 Oil Pan Part Number: 078-103-603-M
$581.91 MSRP: $815.00You Save: $233.09 (29%)Ships in 1-2 Business Days
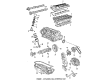
Audi 100 Oil Pan Part Number: 034-103-599-B
$282.03 MSRP: $395.00You Save: $112.97 (29%)Ships in 1-2 Business Days
Audi 100 Oil Pan
Choose original equipment manufacturer Oil Pan for great performance and strong durability. They use Audi's official craftsmanship and high-grade materials, and meet strict quality standards. Are you looking for quality Oil Pan at a good price? Come to our online store. We carry a wide range of genuine parts for your Audi 100 and the prices are competitive. Each part comes with the manufacturer's warranty. You can install with confidence and get steady results. Over time, you'll save money and avoid hassle. Keep your maintenance simple and protect your vehicle with OEM parts. Get the quality your 100 needs now.
Audi 100 Oil Pan Parts and Q&A
- Q: How to remove and refit the oil pan for 5-cylinder diesel engines on Audi 100?A:In order to get rid of the oil pan, one first puts on the handbrake and lifts the front part of the vehicle and places it on the axle stands. Removal of undershield that is under the engine and removal of the dipstick. Place a container under the oil pan, unscrew the drain plug and empty the engine oil cleaning the plug and replacing again. In later AAT and AEL engines, inspected sealing washers on the crank case ventilation oil separator return pipe attached to the drain plug. Unscrew the front mounting bolts of the crossmember (to the final three threads) at the bottom of the front suspension crossmember, and then lower the crossmember with the aid of a trolley jack. Twist the crankshaft to position the cut-out sections of the oil pan and flywheel so that the two rear oil pan bolts are accessible and then unscrew and remove the oil pan bolts with a multi-splined key. Take out the oil pan and the gasket and tap it carefully with the mallet. To refit, clean the contact faces of the oil pan, contact block and fit a new gasket to the oil pan then install the bolts, ensuring no jointing compound is used, and tighten them in a diagonal sequence to the required torque. Install crossmember front mounting bolts. Tighten the crossmember front mounting bolts, refit wiring supports and hose supports, and re-insert engine dipstick. To refit the banjo union with new sealing washers and screw the bolt to the required torque on the case of later AAT and AEL engines. Lastly, re-fit the undershield, drop the car to the ground and pour the right amount of oil into the engine.

Related Audi 100 Parts
 Audi 100 Cam Gear
 Audi 100 Crankshaft Timing Gear
 Audi 100 Engine Cover
 Audi 100 Intake Valve
 Audi 100 Oil Pan Gasket
 Audi 100 Oil Pump Gasket
 Audi 100 Piston
 Audi 100 Timing Belt Idler Pulley
 Audi 100 Timing Cover
 Audi 100 Timing Cover Gasket
 Audi 100 Valve Spring Retainer
 Audi 100 Valve Spring Retainer Keeper