×
- Hello
- Login or Register
- Quick Links
- Live Chat
- Track Order
- Parts Availability
- RMA
- Help Center
- Contact Us
- Shop for
- Audi Parts
My Garage
My Account
Cart
Genuine Audi A3 Driveshaft
Drive Shaft- Select Vehicle by Model
- Select Vehicle by VIN
Select Vehicle by Model
orMake
Model
Year
Select Vehicle by VIN
For the most accurate results, select vehicle by your VIN (Vehicle Identification Number).
6 Driveshafts found

Audi A3 Drive Shaft Part Number: 5WA-521-101-H
$646.31 MSRP: $835.57You Save: $189.26 (23%)Ships in 1-2 Business Days
Audi A3 Drive Shaft Part Number: 5Q0-521-101-BJ
$1430.05 MSRP: $1716.74You Save: $286.69 (17%)Ships in 1-2 Business DaysAudi A3 Drive Shaft Part Number: 5Q0-521-101-BH
$1456.29 MSRP: $1748.24You Save: $291.95 (17%)Ships in 1-2 Business DaysAudi A3 Drive Shaft Part Number: 5Q0-521-101-AH
$1609.46 MSRP: $1932.12You Save: $322.66 (17%)Ships in 1-2 Business Days
Audi A3 Propeller Shaft Part Number: 1K0-521-101-P
$1541.56 MSRP: $1850.61You Save: $309.05 (17%)Ships in 1-2 Business DaysAudi A3 Propeller Shaft Part Number: 1K0-521-101-J
$1567.80 MSRP: $1882.11You Save: $314.31 (17%)Ships in 1-2 Business Days
Audi A3 Driveshaft
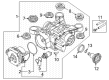
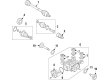
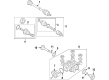
The Audi A3 Driveshaft is the critical component that delivers engine torque to the other components of the drivetrain, allowing the wheels to rotate each time the driver depresses the accelerator. Fitted between the transmission and differentials, this Driveshaft transmits rotational force over a gap that fixed gears cannot cross, all whilst having to deal with flexing suspension and varying road angles. Due to continuous torsion and shear, Audi constructs it of strong yet fairly light tubing so additional weight will not decelerate the Audi hatch. In order to have power flow across bumps or in tight turns, the Driveshaft employs universal joints, or Cardan joints, which pivot to ensure alignment, as well as splined or prismatic sections that slide as distance changes. Previous A3 models typically had a single-piece Driveshaft, with two universal joints, compact and suitable for small wheelbases. The design was adapted into a two-piece format joined by a center support bearing that gives the assembly more length and a shape that provides better balance and minimised vibration at high speed. Nevertheless, all these differences do not change the fact that each style serves the same purpose, constant torque and even acceleration. Audi has optimised joint choice and wall thickness to suit increasing performance requirements throughout the Driveshaft's development, and each modern Audi leaves the factory with a finely tuned shaft that allows the cabin to remain quiet as the drivetrain labours.
Choose original equipment manufacturer Driveshaft for great performance and strong durability. They use Audi's official craftsmanship and high-grade materials, and meet strict quality standards. Are you looking for quality Driveshaft at a good price? Come to our online store. We carry a wide range of genuine parts for your Audi A3 and the prices are competitive. Each part comes with the manufacturer's warranty. You can install with confidence and get steady results. Over time, you'll save money and avoid hassle. Keep your maintenance simple and protect your vehicle with OEM parts. Get the quality your A3 needs now.
Audi A3 Driveshaft Parts and Q&A
- Q: How to refit a new hub bolt and driveshaft on Audi A3?A:A new hub bolt will be required on refitting. On automatic transmission models, to gain the necessary clearance to withdraw the left-hand driveshaft, it may be necessary to unbolt the rear engine transmission mounting from the subframe and lift the engine slightly. Begin by removing the wheel trim or hub cap, applying the handbrake, and partially unscrewing the relevant hub bolt by a maximum of 90° while the vehicle rests on its wheels, noting that the bolt is very tight and may require a suitable extension bar. Unscrew the roadwheel securing bolts, then apply the handbrake, jack up the front of the vehicle, and support it on axle stands before removing the appropriate front roadwheel. Remove the retaining screws or clips, and take off the under shields from beneath the engine/transmission unit to access the driveshafts, unbolting the heat shield from the transmission housing if necessary. Unscrew and remove the hub bolt, discarding it and obtaining a new one. Unscrew the three nuts securing the front suspension lower arm ballpoint to the lower arm, discarding the nuts as new ones must be used on refitting. Lever the lower arm downwards to release it from the ball joint studs, then pull the hub carrier outwards while withdrawing the driveshaft outer constant velocity joint from the hub. If the joint splines are a tight fit, tap the joint out using a soft-faced mallet and drift, or press it out using a suitable tool if necessary. Support the driveshaft by suspending it with wire or string to avoid damage. For the inner joint with drive flange, use a multi-splined tool to unscrew and remove the bolts securing the inner driveshaft joint to the transmission flange, recovering any retaining plates. For the inner joint splined to the differential sun gear, position a container beneath the transmission to catch spilled oil, then pull out the driveshaft, using a lever against the transmission casing if the internal driveshaft circlip is tight. Mark the inner joint housing and driveshaft in relation to each other, loosen the clip, ease off the rubber gaiter, and pull the tripod out of the housing. Maneuver the driveshaft out from underneath the vehicle, recovering the gasket from the end of the inner constant velocity joint, discarding it and obtaining a new one. If moving the vehicle is unavoidable, temporarily insert the outer end of the driveshaft(s) in the hub(s) and tighten the retaining bolt(s), ensuring the inner end(s) are supported. Check the condition of the circlip on the inner end of the driveshaft and renew it if necessary. Clean the splines on each end of the driveshaft and in the hub, applying a little oil, and wipe clean the oil seal in the transmission casing, renewing it if necessary. Smear a little oil on the lips of the oil seal before fitting the driveshaft. Ensure that the transmission flange and inner joint mating surfaces are clean and dry, fitting a new gasket if necessary. Maneuver the driveshaft into position, aligning the inner joint holes with those on the transmission flange, and refit the retaining bolts, tightening them to the specified torque. For the inner joint splined to the differential sun gear, locate the inner end of the driveshaft into the transmission, turning it as necessary to engage the splines, and press it in until the internal circlip engages the groove. Fill the inner joint with the specified quantity of grease, locate the driveshaft tripod into the housing, aligning the previously made marks, ease the gaiter onto the housing, and refit the clip. With the lower arm levered downwards, engage the outer joint with the hub, fit the new hub bolt, and use it to draw the joint fully into position. Align the ball joint studs with the holes in the lower arm, release the arm, and fit the three new nuts, tightening them to the specified torque. Where applicable, fit new rear engine/transmission mounting-to-subframe bolts and tighten them to the specified torque. Tighten the driveshaft bolt to the Stage 1 torque, ensuring it is tightened with the wheel clear of the ground. Refit the roadwheel, lower the vehicle to the ground, and angle-tighten the driveshaft bolt through the Stage 2 angle. Once the driveshaft bolt is correctly tightened, tighten the wheel bolts to the specified torque and refit the wheel trim or hub cap.
- Q: How to remove and refit the right-hand driveshaft on Audi A3?A:To install the right-hand drive, unscrew the three bolts that hold the intermediate driveshaft in place on the bearing bracket at the rear of the cylinder block and place a container under the transmission to hold any spilled oil or fluid when removing the intermediate shaft. Perform the following steps (1) remove the driveshaft using the transmission splined sun gear/input shaft and withdraw it through the bearing bracket and (2) remove and dispose the O-ring seal of the input shaft and then replace the input shaft with a new one. To do the overhaul, check the intermediate driveshaft and bearing by inspecting them, and replacing them in case of wear and damage. One would prefer a hydraulic press to press the driveshaft out of the bearing though it might be doable to use a soft faced mallet to press the drive shaft out as long as one supports the bearing in a vice. Install the new bearing using a proper metal tube to press or drive the new bearing all the way into the driveshaft making sure that you press only on the inside of the bearing race. To refit, the process should be inverted, but it is necessary to get a new O-ring seal to fit the input shaft, tighten all the mounting nuts and bolts to the correct torque, and refill the transmission oil or fluid accordingly.


