×
- Hello
- Login or Register
- Quick Links
- Live Chat
- Track Order
- Parts Availability
- RMA
- Help Center
- Contact Us
- Shop for
- Audi Parts
My Garage
My Account
Cart
Genuine Audi 100 Shock And Strut Mount
Shock and Strut Mount Kit- Select Vehicle by Model
- Select Vehicle by VIN
Select Vehicle by Model
orMake
Model
Year
Select Vehicle by VIN
For the most accurate results, select vehicle by your VIN (Vehicle Identification Number).
4 Shock And Strut Mounts found

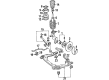
Audi 100 Spring Upper Mount Part Number: 443-412-377
$70.21 MSRP: $98.33You Save: $28.12 (29%)Ships in 1-2 Business Days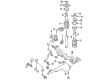
Audi 100 Upper Spring Seat Part Number: 443-512-113
$85.68 MSRP: $120.00You Save: $34.32 (29%)Ships in 1-2 Business DaysAudi 100 Spring Upper Mount Part Number: 443-412-321
$87.11 MSRP: $122.00You Save: $34.89 (29%)Ships in 1-2 Business Days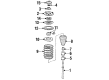
Audi 100 Shock Absorber Support Part Number: 4A0-412-321-C
$158.65 MSRP: $222.20You Save: $63.55 (29%)Ships in 1-2 Business Days
Audi 100 Shock And Strut Mount
Choose original equipment manufacturer Shock And Strut Mount for great performance and strong durability. They use Audi's official craftsmanship and high-grade materials, and meet strict quality standards. Are you looking for quality Shock And Strut Mount at a good price? Come to our online store. We carry a wide range of genuine parts for your Audi 100 and the prices are competitive. Each part comes with the manufacturer's warranty. You can install with confidence and get steady results. Over time, you'll save money and avoid hassle. Keep your maintenance simple and protect your vehicle with OEM parts. Get the quality your 100 needs now.
Audi 100 Shock And Strut Mount Parts and Q&A
- Q: What are the steps required for refitting the shock and strut mount upper mounting nuts and lower mounting bolt nut on Audi 100?A:New strut upper mounting nuts and a lower mounting bolt nut will be required on refitting. Begin by chocking the front wheels, jacking up the rear of the car, and supporting it on axle stands before removing the relevant rear roadwheel. For models with rear disc brakes, secure the disc to the hub with a wheel bolt while the wheel is removed. If the vehicle has self-levelling rear suspension, depressurise the hydraulic system, clean the area around the hydraulic union on the top of the strut, unscrew the union nut, and disconnect the hydraulic pipe, ensuring to plug or cover the hose end and strut port to minimise fluid loss and prevent dirt entry. Position a jack underneath the rear axle and raise it to support the axle weight. Slacken and remove the nut, then withdraw the lower mounting bolt securing the strut to the axle, discarding the nut and preparing to use a new one on refitting. Next, slacken and remove the upper mounting nuts, lowering the axle slightly to manoeuvre the strut assembly out from underneath the vehicle, discarding the mounting nuts for new ones on refitting. For refitting, manoeuvre the strut into position, refit the lower mounting bolt, and screw on the new nut without tightening it yet. Raise the axle and locate the strut upper mounting on its studs, fitting the new upper mounting nuts and tightening them to the specified torque setting. For models with self-levelling rear suspension, reconnect the hydraulic pipe to the strut and tighten the union nut to the specified torque. Refit the roadwheel, lower the vehicle to the ground, and tighten the wheel bolts to the specified torque. With the vehicle resting on its wheels, rock the car to settle the strut in position, then tighten the lower mounting bolt to the specified torque setting. Finally, for models with self-levelling rear suspension, check the hydraulic fluid level as part of the weekly checks.


