×
- Hello
- Login or Register
- Quick Links
- Live Chat
- Track Order
- Parts Availability
- RMA
- Help Center
- Contact Us
- Shop for
- Audi Parts
My Garage
My Account
Cart
Genuine Audi 100 Thermostat
Engine Coolant Thermostat- Select Vehicle by Model
- Select Vehicle by VIN
Select Vehicle by Model
orMake
Model
Year
Select Vehicle by VIN
For the most accurate results, select vehicle by your VIN (Vehicle Identification Number).
1 Thermostat found

Audi 100 Thermostat Part Number: 069-121-113
$90.43 MSRP: $126.65You Save: $36.22 (29%)Ships in 1-2 Business Days
Audi 100 Thermostat
Choose original equipment manufacturer Thermostat for great performance and strong durability. They use Audi's official craftsmanship and high-grade materials, and meet strict quality standards. Are you looking for quality Thermostat at a good price? Come to our online store. We carry a wide range of genuine parts for your Audi 100 and the prices are competitive. Each part comes with the manufacturer's warranty. You can install with confidence and get steady results. Over time, you'll save money and avoid hassle. Keep your maintenance simple and protect your vehicle with OEM parts. Get the quality your 100 needs now.
Audi 100 Thermostat Parts and Q&A
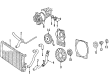
- Q: How to remove and test a thermostat on Audi 100?A:All 4-cylinder engines are fitted with electrically operated cooling fan(s), and 5-cylinder engines have the main fan driven by the auxiliary drivebelt via viscous coupling with any auxiliary fan being electrically powered. The supply of the cooling fans is carried by the ignition switch and a fuse and it is completed by the cooling fan thermostatic switch on the left side of the radiator. When a fan is switched off, the engine must be operated until it has reached normal working temperature, and then it should be left to idle, the fan should come on shortly after that. Otherwise, the ignition must be turned off and the wiring plug between the cooling fan switch must be taken out. One way of finding out whether the switch is faulty is to try to bridge the relevant contacts in the wiring plug with a spare wire with the ignition on. In case the fan now remains inoperative, there is need to test battery voltage at the feed wire to the switch and continuity between the switch earth terminal and a good earth point on the body. In the event both the switching and wiring are operable, it is possible that the actual motor is faulty and this can be checked by connecting a 12 volt supply to the motor itself. To be able to remove the radiator, it is necessary to loosen the retaining bolts of the fan shroud assembly then unclip the motor wiring and undo the retaining nuts to separate the motor assembly and the shroud. In case of a defective motor, the whole unit will have to be replaced. To refit, the motor assembly can be supported to the shroud, then the motor wiring need to be well routed then its shroud assembly must be reattached to the radiator and attached. In 5-cylinder engines, the operation of the viscous coupling is physically verified to exclude the presence of fluid leakage and damage to the fan blades, and the fan should freely rotate at room temperature and clamp together during the hot engine operation. To detach the two, the locating sleeves of the bonnet release cable will have to be disconnected, and the connecting bolts of the radiator upper mounting brackets will have to be taken out. The alignment marks are to be made, and then the crossmember is supposed to be placed over the radiator. The coupling is unscrewed off the drive pulley with an open ended spanner leaving the drive pulley in place with a peg spanner. Then the fan and coupling assembly is manipulated out. To refit, it is important that the fan blade is fitted to the coupling in the right way and then the assembly is fitted to the drive pulley and tightened to the required torque. The radiator upper mounting brackets and bonnet locking crossmember are then moved back to its original position and all components should be firmly tightened and the bonnet release cable guides re-clipped.

Related Audi 100 Parts
 Audi 100 Coolant Reservoir
 Audi 100 Coolant Reservoir Hose
 Audi 100 Cooling Fan Assembly
 Audi 100 Cooling Fan Bracket
 Audi 100 Cooling Hose
 Audi 100 Fan Motor
 Audi 100 Radiator
 Audi 100 Radiator Cap
 Audi 100 Radiator Hose
 Audi 100 Thermostat Housing
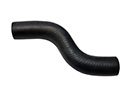 Audi 100 Water Hose
 Audi 100 Water Pump Gasket