×
- Hello
- Login or Register
- Quick Links
- Live Chat
- Track Order
- Parts Availability
- RMA
- Help Center
- Contact Us
- Shop for
- Audi Parts
My Garage
My Account
Cart
Genuine Audi 100 Center Console
Floor Console Assembly- Select Vehicle by Model
- Select Vehicle by VIN
Select Vehicle by Model
orMake
Model
Year
Select Vehicle by VIN
For the most accurate results, select vehicle by your VIN (Vehicle Identification Number).
1 Center Console found

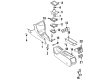
Audi 100 Front Console Part Number: 4A1-863-241-B-9XB
$157.44 MSRP: $220.50You Save: $63.06 (29%)Ships in 1-2 Business Days
Audi 100 Center Console
Choose original equipment manufacturer Center Console for great performance and strong durability. They use Audi's official craftsmanship and high-grade materials, and meet strict quality standards. Are you looking for quality Center Console at a good price? Come to our online store. We carry a wide range of genuine parts for your Audi 100 and the prices are competitive. Each part comes with the manufacturer's warranty. You can install with confidence and get steady results. Over time, you'll save money and avoid hassle. Keep your maintenance simple and protect your vehicle with OEM parts. Get the quality your 100 needs now.
Audi 100 Center Console Parts and Q&A
- Q: How to remove the Center Console on Audi 100?A:To remove the console, start by sliding the front seats fully forward and disconnecting the battery negative terminal. Firmly apply the handbrake, then prise out the retaining clip from the base of the handbrake lever grip and slide the grip off. Remove the rear cigarette lighter insert if fitted, and unclip the trim plate from beneath the rear seat vents to access the ventilation outlet rear retaining screws. Peel back the storage compartment lining, slacken and remove the front and rear retaining screws, and take out the ventilation outlet panel, disconnecting any wiring connectors as they become accessible. For manual transmission models, unclip the gearchange lever gaiter surround and fold the gaiter back; if removing the front section of the console, unscrew the knob from the gearchange lever and remove the gaiter completely. For automatic transmission models, unclip the trim cover from around the selector lever. Next, slacken and remove the console rear section retaining screws, lift the front of the rear section, and manoeuvre it out. To remove the front section, prise out the ventilation outlet panel to access the retaining screws, then unclip the end covers from the facia switch panel assembly and remove the console retaining screws behind them. For models with standard heating controls, pull off the knobs and remove the faceplate; for those with a fully automatic air conditioning system, unclip the control unit trim panel. Remove the ashtray assembly by undoing the retaining screws and freeing the illumination light. Prise out the trim covers from the front corners of the console to access the retaining nuts, then slacken and remove the front retaining nuts and loosen the rear retaining screws to manoeuvre the console front section out. Refitting is the reverse of removal, ensuring the ventilation outlets are correctly engaged with the ducts, all wiring is routed properly, and fasteners are securely tightened, followed by checking the operation of all switches.
Related Audi 100 Parts
 Audi 100 Brake Caliper
 Audi 100 Door Lock Actuator
 Audi 100 Exhaust Manifold
 Audi 100 Fuel Cap
 Audi 100 Headlight Screws
 Audi 100 HVAC Heater Blend Door Actuator
 Audi 100 Instrument Cluster
 Audi 100 Pillar Panels
 Audi 100 Starter Brush
 Audi 100 Trailing Arm Bushing