×
- Hello
- Login or Register
- Quick Links
- Live Chat
- Track Order
- Parts Availability
- RMA
- Help Center
- Contact Us
- Shop for
- Audi Parts
My Garage
My Account
Cart
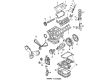
Genuine Audi 100 Piston
Engine Pistons- Select Vehicle by Model
- Select Vehicle by VIN
Select Vehicle by Model
orMake
Model
Year
Select Vehicle by VIN
For the most accurate results, select vehicle by your VIN (Vehicle Identification Number).
1 Piston found

Audi 100 Piston Part Number: 078-107-065-G
$321.30 MSRP: $450.00You Save: $128.70 (29%)Ships in 1-2 Business Days
Audi 100 Piston
Choose original equipment manufacturer Piston for great performance and strong durability. They use Audi's official craftsmanship and high-grade materials, and meet strict quality standards. Are you looking for quality Piston at a good price? Come to our online store. We carry a wide range of genuine parts for your Audi 100 and the prices are competitive. Each part comes with the manufacturer's warranty. You can install with confidence and get steady results. Over time, you'll save money and avoid hassle. Keep your maintenance simple and protect your vehicle with OEM parts. Get the quality your 100 needs now.
Audi 100 Piston Parts and Q&A
- Q: Have the pistons been correctly assembled to their respective connecting rods and have the piston ring-to-groove clearances been checked on Audi 100?A:We assume that the pistons are now in the right place with respect to their connecting rods, and the clearance of the piston ring with respect to the groove has been verified. The end gaps should be inspected prior to the fitting of rings to the pistons by ensuring that rings are inserted in the cylinder bores. Assemble the piston assemblies and the new ring sets on a clean working surface to maintain a collection of components together throughout and after end gap checking. Place the crankcase on its side so that one can access the top and bottom of the bores. Install the No 1 piston top ring and insert it into the top of the bore, forcing it to close to the bottom using the No 1 piston and pushing it firmly into the piston crown to make sure the top ring is very square. Check the ends of the piston ring with a set of feeler blades, with the appropriate blade going through the gap with minimum resistance and check this action against the specification. When a measurement turns out to be undersize, then that should be corrected to allow the ends of the ring to hit each other during operation and this would cause damage to the engine and so, this is done by painting down the ends of the ring gradually ensuring not to break it. After ensuring that all end gaps of the piston rings are correct, attach them to the pistons, starting with the oil control ring (two side rails with an expander ring in between) and then the two compression rings, which should be attached to the ring groove and orientation that they are marked on; the stamps face upwards. Install the end gaps about the piston at 120 degree intervals to one another and should the piston ring manufacturer have special instruction on the fitting, follow those strictly.
Related Audi 100 Parts
 Audi 100 A/C Accumulator
 Audi 100 Brake Pad Set
 Audi 100 CV Joint
 Audi 100 Oil Cooler Hose
 Audi 100 Transmission Filter